
Mastering the Fit: Your Guide to Applying a Condom Catheter
Why Proper Condom Catheter Application Matters
Learning how to put on a condom catheter correctly is essential for managing urinary incontinence safely and comfortably. Here's the quick process:
Quick Steps:
- Prepare - Wash hands, clean and dry penis, trim hair if needed
- Size - Use proper catheter diameter based on penis measurement
- Apply - Leave 1-2 inches space at tip, roll down shaft smoothly
- Secure - Hold for 10-15 seconds to activate adhesive
- Connect - Attach drainage tubing and position bag below bladder level
Condom catheters offer a non-invasive alternative to internal catheters for men experiencing urinary incontinence. Unlike indwelling catheters that go inside the body, these external devices work like a sheath that collects urine and directs it to a drainage bag.
The benefits are significant: reduced risk of urinary tract infections, greater comfort, and improved quality of life compared to adult briefs or internal catheters. Many people find them easier to apply and more comfortable than other incontinence management options.
However, proper application is crucial. An incorrectly fitted condom catheter can leak, fall off, or cause skin irritation. The key lies in choosing the right size, preparing the skin properly, and following the correct technique.
Whether you're new to condom catheters or looking to improve your technique, this guide will walk you through each step to ensure a secure, comfortable fit that works for your lifestyle.

Key terms for how to put on a condom catheter:
Step 1: Preparation and Sizing
Meticulous preparation is paramount for a successful, comfortable, and leak-free experience. This initial stage involves gathering supplies, ensuring proper sizing, and preparing the skin.

Essential Supplies You'll Need
Having all your supplies ready will make the process smoother and more hygienic.
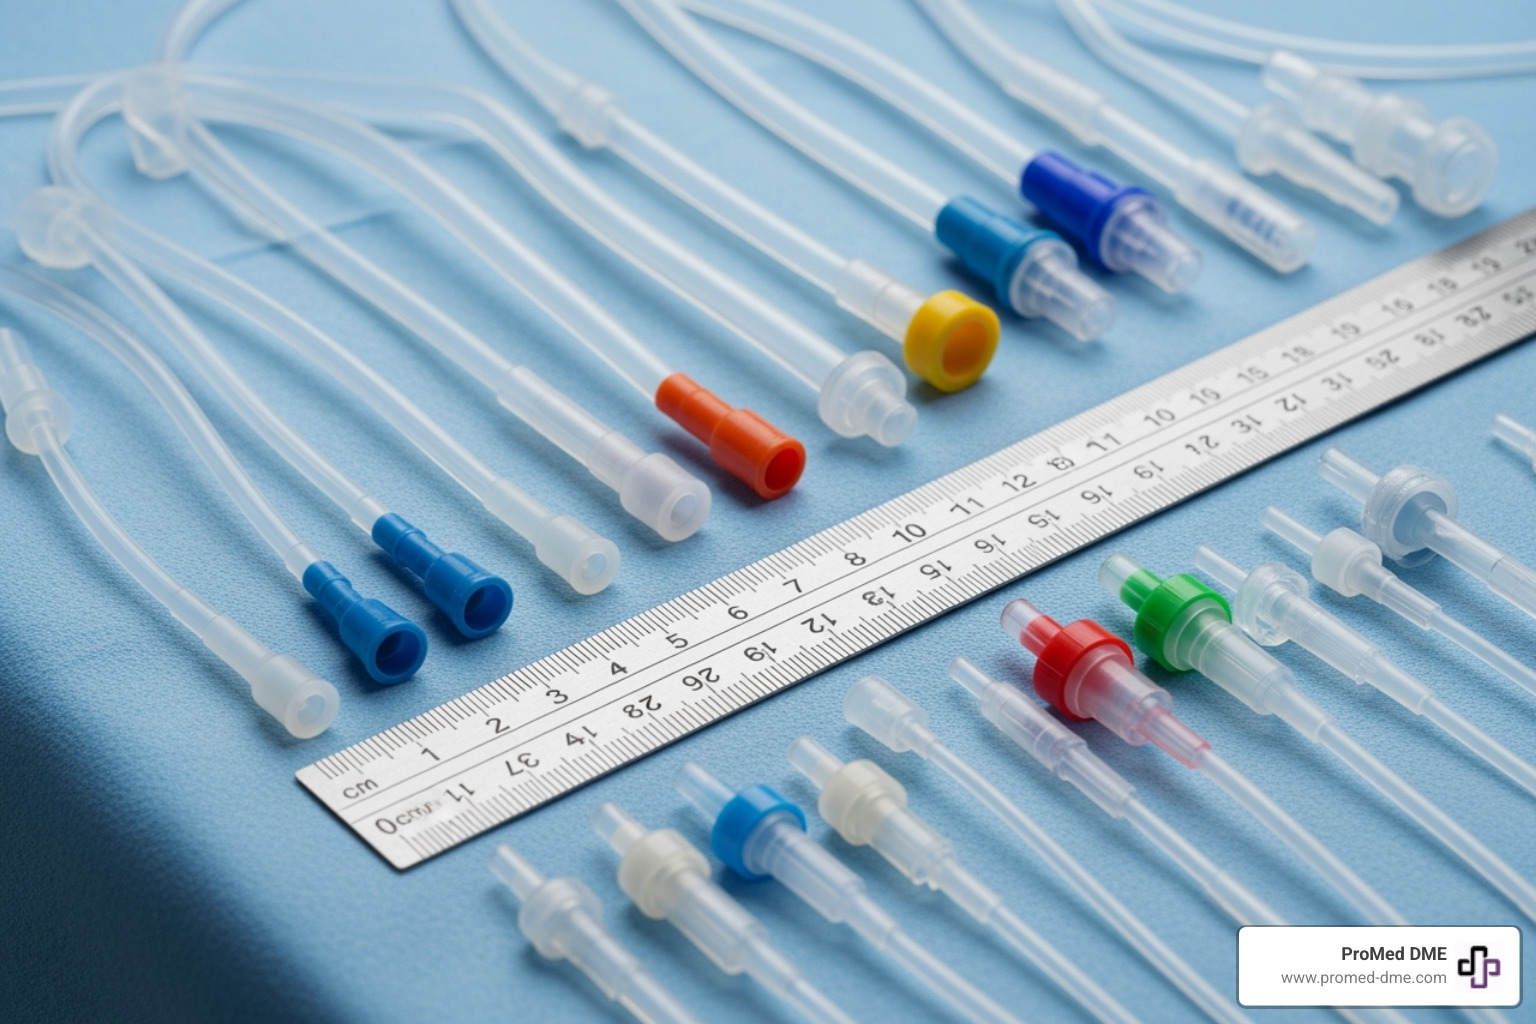
- Condom Catheter Kit: Ensure you have the correct type (silicone or latex, self-adhering or non-adhering) and size.
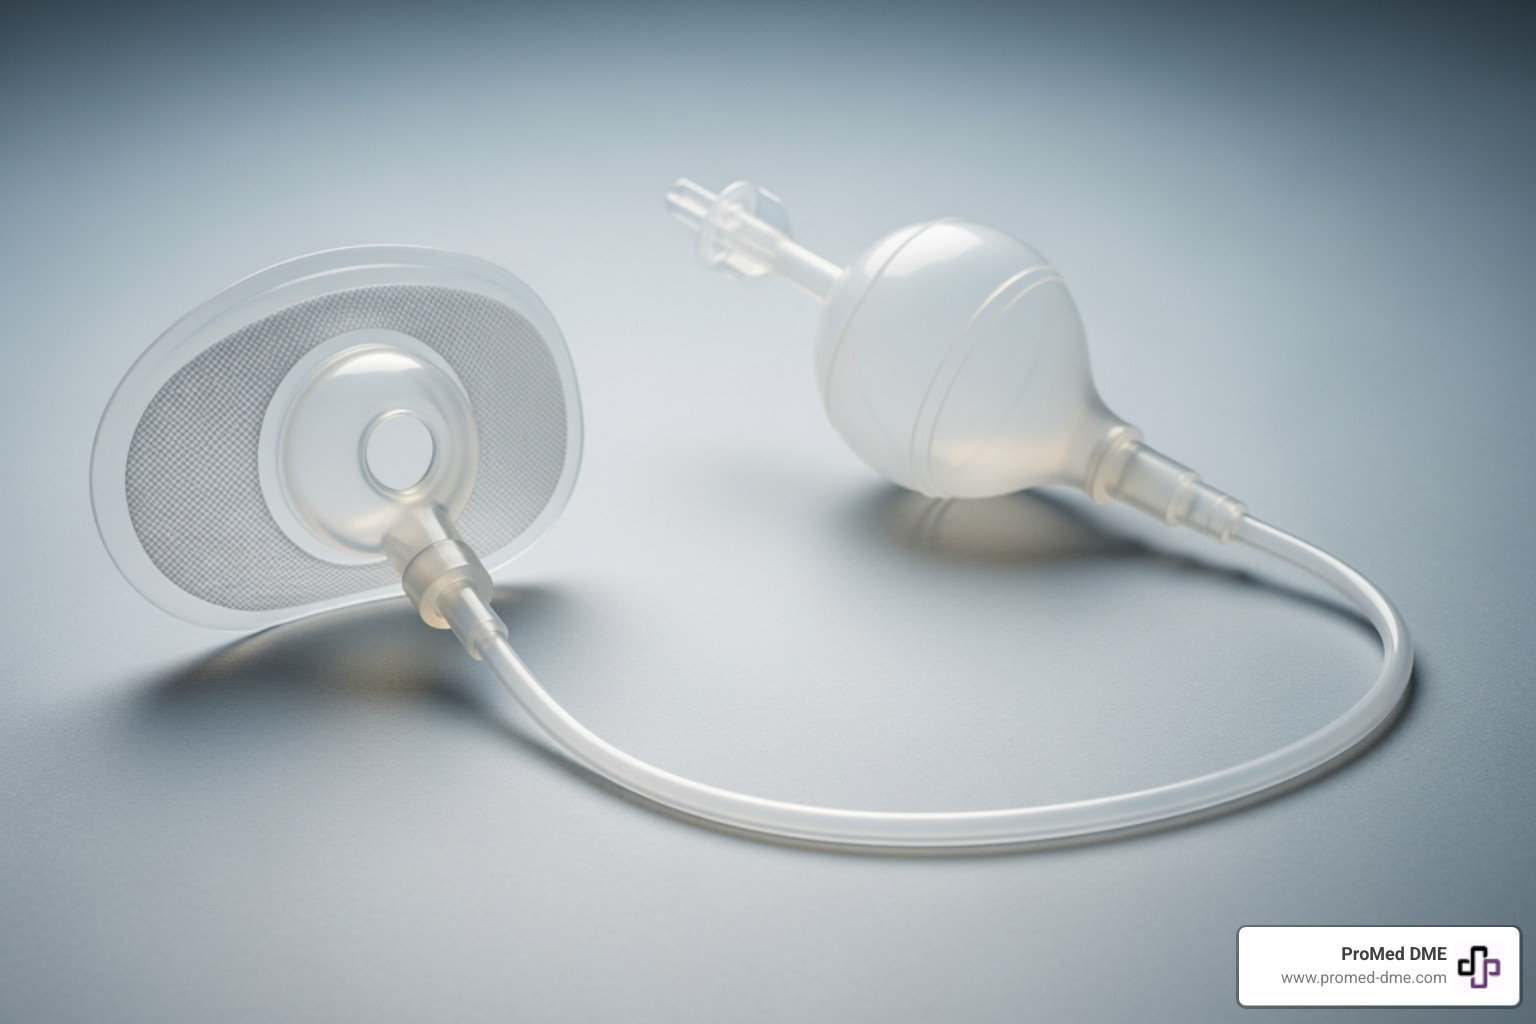
- Urinary Drainage Bag: A leg bag for daytime or a larger bedside bag for overnight.
- Extension Tubing: To connect the catheter to the drainage bag.
- Mild, Residue-Free Soap and Warm Water: Avoid lotion-based soaps that interfere with adhesion.
- Washcloth and Towel
- Clean Gloves
- Scissors (Non-pointed): For trimming pubic hair.
- Skin Protectant Wipe (Optional but Recommended): Creates a protective barrier between skin and adhesive.
- Hair Guard (Optional): To keep hair out of the way.
- Dedicated Container: For emptying the drainage bag.
Sizing is Critical: Choosing the correct size is vital. A catheter that's too small can restrict blood flow, while one that's too large can leak or fall off. To find the right size, measure the circumference of the penis shaft. Most manufacturers provide sizing guides. A simple method is to wrap a string around the shaft, measure the string, and then divide by 3.14 (Pi) to get the diameter in millimeters. It's often wise to try a few different sizes initially to find the perfect fit.
How to Prepare the Skin for a Secure Fit
Proper skin preparation is crucial for catheter adherence and skin health.
- Hand Washing: Wash hands thoroughly with soap and water, then put on clean gloves.
- Hair Trimming: Trim hair on the shaft and base of the penis to about ¼ inch. Do not shave with a razor, as this can cause nicks and irritation.
- Washing the Penis: Gently wash the penis, scrotum, and groin with mild, residue-free soap and warm water. If uncircumcised, retract the foreskin to clean the head, then rinse completely.
- Thoroughly Drying the Skin: The skin must be completely dry for the adhesive to work. Gently pat the area dry with a clean towel. Allow 15-20 minutes for skin to fully air dry after a bath or shower.
- Skin Inspection: Check the skin for any redness, blisters, or irritation. Do not apply a catheter to compromised skin; contact your healthcare provider for advice.
- Applying Skin Barrier (Optional): Apply a skin protectant wipe to the shaft and let it dry completely. This shields skin from adhesive and urine.
- Instructions for Uncircumcised Individuals: After cleaning, always return the foreskin to its natural, forward position over the head of the penis. The catheter is applied over the foreskin in this natural position. Never leave the foreskin retracted under the catheter, as this can cause severe swelling. For more detailed guidance, you can refer to patient education resources like Shepherd Center's guide on condom catheters for males.
Step 2: How to Put on a Condom Catheter and Connect the Bag
With your skin carefully prepared and your supplies at the ready, we're now at the heart of the matter: applying the condom catheter itself and connecting it to the drainage system. This is where precision and gentle handling come into play to ensure comfort and functionality.

The Correct Technique for Applying the Condom Catheter
This step is crucial for preventing leaks and ensuring the catheter stays securely in place.
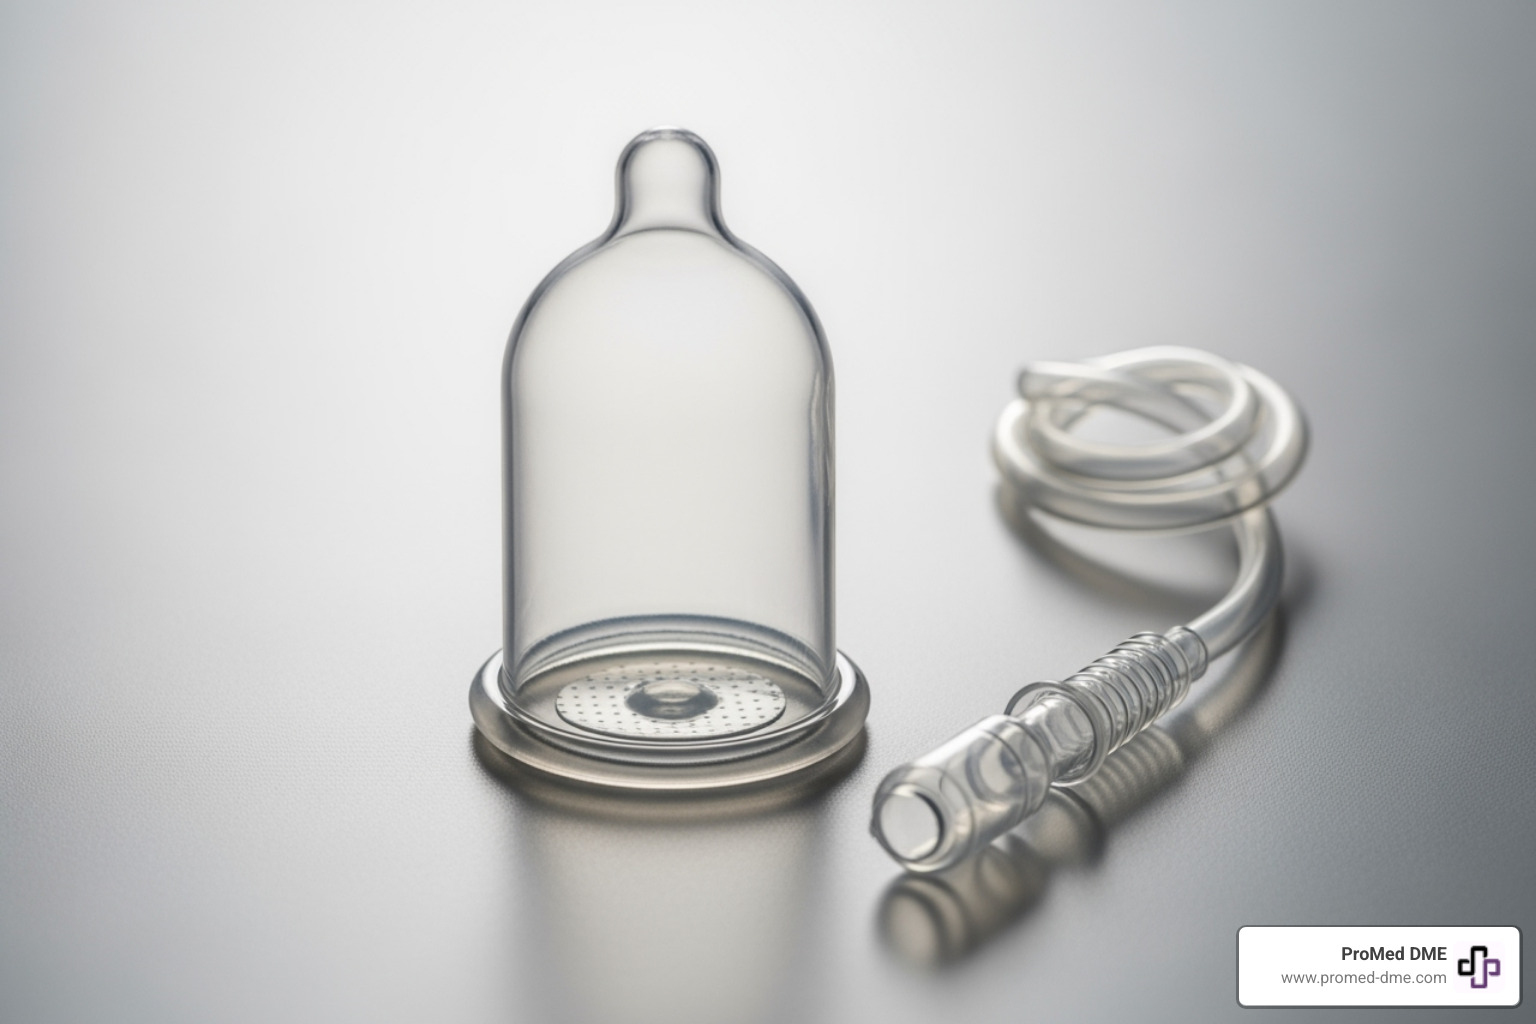
- Grasp the Penis: Gently grasp the penis along the shaft with your non-dominant hand. This helps to extend the penis slightly, making application easier.
- Positioning the Catheter: Take the condom catheter with your dominant hand. If it's a self-adhesive type, you'll typically unroll it slightly at the tip. Place the rolled catheter over the tip of the penis.
- Leaving Space: This is a vital point for comfort and proper drainage. Leave about 1 to 2 inches (or 2 cm / 0.75 inches) of space between the tip of the penis and the end of the condom catheter. This gap prevents the tip of the penis from being irritated by contact with the catheter's end and allows urine to flow freely without creating back pressure.
- Unrolling Smoothly: Carefully and slowly start to unroll the condom catheter down the shaft of the penis towards its base. The goal is a smooth, even roll, similar to putting on a regular condom. Avoid twisting or creating wrinkles as you unroll. If you encounter wrinkles, it might indicate that the catheter is too large, or your application technique needs adjustment. Gently smooth out any wrinkles as you go.
- Securing the Adhesive: Once the condom catheter is fully unrolled to the base of the penis, it's time to secure it. If you're using a self-adhering catheter, gently squeeze the catheter along the shaft for about 10 to 15 seconds. This gentle pressure helps to activate the adhesive, ensuring it adheres properly and evenly to the skin. If your catheter uses an elastic strip, wrap it spirally around the base of the penis, ensuring it's snug but not too tight to restrict blood flow. For brush-on adhesives, apply lightly according to product directions before rolling on the condom, then apply gentle pressure.
The aim is a snug, secure fit without any constriction. Your penis will thank you for being gentle!
Connecting and Positioning the Drainage System
Once the condom catheter is securely in place, the next step is to connect it to the urine drainage system. This system ensures that urine is collected safely and efficiently.
- Connecting Tubing to Catheter Tip: Take the drainage tubing and connect one end to the small spout or connector at the end of the condom catheter. Ensure the connection is firm and secure to prevent leaks, but avoid pushing the connector too far into the catheter, which could cause irritation at the tip of the penis. Make sure the tubing is not twisted or kinked.
- Attaching Tubing to Drainage Bag: Connect the other end of the drainage tubing to your chosen urinary drainage bag (either a leg bag or a bedside bag). Again, ensure a secure, twist-free connection.
- Positioning the Bag Below the Bladder: This is a critical principle for gravity drainage. The drainage bag must always be positioned below the level of your bladder (or hip, if using a leg bag). This allows urine to flow freely from the bladder, through the catheter and tubing, and into the bag, preventing backflow of urine into the bladder, which can lead to infection. For a bedside bag, hang it on the side of the bed frame or a chair, ensuring it's always lower than your body.
- Securing Leg Bag Straps: If you're using a leg bag, attach it securely to your leg using the provided straps. Leg bags can typically be worn on the thigh or below the knee on the calf. We recommend wearing the leg bag below the knee for optimal comfort and discretion. The straps should be firm enough to hold the bag in place but not so tight that they dig into your skin or restrict circulation. Check for comfort and adjust as needed. Some people find it helpful to attach the leg bag to a different leg every other day to prevent skin damage from constant pressure.
- Preventing Kinks in Tubing: Ensure the drainage tubing is always in a straight line or a large, gentle coil. Avoid any sharp bends, kinks, or twists, as these will obstruct urine flow and can lead to urine backing up, leakage, or discomfort. Allow for slight slack in the tubing to accommodate movement without pulling on the catheter. You can use an extra strap to attach the tubing to your thigh to prevent pulling on the condom during activities.

Remember to empty your leg bag when it's about half full to prevent it from becoming too heavy and pulling on the catheter or straps. For more information on managing your drainage system, resources from reputable sources like the Cleveland Clinic offer valuable insights.
Step 3: Daily Care, Removal, and Troubleshooting
Proper application is just the beginning. Consistent daily care, safe removal, and the ability to troubleshoot common issues are paramount for continued comfort and hygiene.
Daily Maintenance and Safe Removal
Condom catheters require regular attention to prevent complications.
- Change the Catheter Every 24 Hours: Most disposable condom catheters are designed for daily changes. This helps maintain skin integrity, prevents bacterial buildup, and ensures optimal adhesive performance.
- Clean the Drainage Bag:
- Emptying: Empty your drainage bag when it's about two-thirds full, or every 3-4 hours for leg bags and 8 hours for bedside bags. Use a dedicated container and wash it after each use.
- Cleaning: Clean reusable bags daily. Rinse with water, then fill halfway with a solution (1 part vinegar to 3-4 parts water, or 1 part bleach to 10 parts water). Let it sit for 20-30 minutes, then rinse thoroughly and air dry.
- Replacement: Replace drainage bags every 5-7 days to ensure hygiene.
- Safe Removal Process: Improper removal can cause skin stripping or pain.
- Wash hands and put on clean gloves.
- Loosen the adhesive by applying a warm, wet washcloth around the catheter for 30-60 seconds. The warmth and moisture weaken the bond.
- Gently and slowly roll the catheter off the penis, from base to tip. Do not pull or tear it off.
- Use adhesive remover wipes if the catheter is still difficult to remove.
- After removal, wash the penis with mild soap and water, dry completely, and inspect the skin for any signs of redness, irritation, or breakdown.
Solving Common Problems and When to Call a Doctor
Knowing how to troubleshoot is key. Here are common problems and solutions:
- Leakage:
- Causes & Solutions: This is often due to incorrect sizing (too large), improper skin prep (skin not dry, hair), or wrinkles in the catheter. Re-evaluate your size, ensure the skin is completely dry, trim hair, and apply the catheter smoothly.
- Skin Irritation, Redness, or Breakdown:
- Causes & Solutions: Can be caused by moisture, pressure (catheter too tight), or an allergy to the material (latex). Ensure proper sizing, change the catheter daily, and always use a skin barrier wipe. If irritation persists, consider switching to a latex-free (silicone) catheter. For more insights, refer to resources like the Cleveland Clinic's guide on condom catheter care.
- Catheter Falling Off:
- Causes & Solutions: Usually due to incorrect sizing (too large), inadequate skin prep (oily/moist skin), or not activating the adhesive properly. Re-check sizing, ensure skin is clean and dry, and apply gentle pressure for 10-15 seconds to secure the adhesive.
- Poor Drainage:
- Causes & Solutions: This indicates an obstruction. Check for kinked tubing, ensure the catheter isn't too tight, and verify there is 1-2 inches of space between the penis tip and the catheter's end.
When to Call a Doctor:Consult your healthcare professional if you experience:
- Severe skin irritation, open sores, or blisters.
- Signs of infection: fever, chills, cloudy or foul-smelling urine, or pain.
- Significant swelling of the penis or foreskin.
- No urine collection for six hours or more.
- Persistent leakage, discomfort, or pain that troubleshooting doesn't resolve.
Your healthcare provider can answer questions and recommend specific products.
Frequently Asked Questions about How to Put on a Condom Catheter
We understand that using a condom catheter can bring up many questions. Here, we address some of the most common inquiries.
How often should I change my condom catheter?
For optimal hygiene and skin health, we recommend changing your disposable condom catheter every 24 hours. A daily change allows for skin inspection, prevents bacterial buildup, and ensures the adhesive remains secure, reducing the risk of leaks.
What is the correct procedure for uncircumcised individuals?
The best practice for uncircumcised individuals is as follows:
- Clean: Gently retract the foreskin to thoroughly clean the head of the penis.
- Return: After cleaning and drying, it is crucial to return the foreskin to its natural, forward position over the head of the penis.
- Apply: Apply the condom catheter directly over the foreskin in its natural state.
- Warning: Never leave the foreskin retracted under the catheter, as this can cause serious complications like swelling (paraphimosis) and restricted blood flow.
Why does my condom catheter keep falling off?
A catheter that repeatedly falls off often signals an issue with sizing, preparation, or application. Here are the primary reasons:
- Incorrect Sizing: If the catheter is too large, it won't create a snug seal. Re-measure your penis diameter to ensure you're using the correct size.
- Improper Skin Preparation: The adhesive needs a clean, dry, residue-free surface. Use a mild, non-lotion soap, rinse thoroughly, and ensure the skin is completely dry.
- Hair Interference: Untrimmed pubic hair can get caught under the adhesive, preventing a secure seal. Trim hair on the shaft and base of the penis.
- Wrinkles in the Catheter: If the catheter is applied with wrinkles, the adhesive won't have full contact with the skin. Roll it on smoothly.
- Insufficient Adhesive Activation: For self-adhering types, gently squeeze the catheter for 10-15 seconds after application to activate the adhesive and ensure a strong bond.
- Penile Retraction: In some cases, the penis may retract, causing the catheter to pull away. If this is a persistent issue, discuss it with your healthcare provider.
By carefully addressing these factors, you can significantly improve the reliability of your condom catheter.
Conclusion
Mastering how to put on a condom catheter is more than just a mechanical process; it's about empowering yourself with the knowledge and technique to manage urinary incontinence with confidence and comfort. We've walked through each critical step, from gathering essential supplies and preparing your skin, to the precise application of the catheter and connection of the drainage system. We've also equipped you with strategies for daily care, safe removal, and troubleshooting common issues.
The key takeaways are clear:
- Preparation is paramount: Proper sizing and meticulous skin hygiene are the foundation for success.
- Precision in application: Leaving adequate space at the tip and ensuring a smooth, wrinkle-free roll with proper adhesive activation is vital.
- Vigilance in maintenance: Daily changes, proper drainage bag care, and regular skin inspection prevent complications.
- Know when to seek help: Don't hesitate to consult a healthcare professional for persistent problems or concerning symptoms.
By following these guidelines, you can significantly reduce the risk of leaks, skin irritation, and discomfort, leading to an improved quality of life. At ProMed DME, we understand the importance of reliable and comfortable solutions for urinary management. We're committed to delivering top-quality products with exceptional customer service. Our dedicated nurse is on staff to answer your questions, and we work with most insurance plans to minimize out-of-pocket expenses.
We are here to support you every step of the way. Explore our wide range of urology supplies and services, and let us help you find the perfect fit for your needs.
Related Resources & Articles
Stay informed with our informative blog posts.
Discover the ProMed Advantage
& Try Our Products
We offer free shipping and legendary customer service to ensure you receive the
best DME products for your needs.